H3C Cloudnet - Cloud Network Management Solution
H3C Cloudnet - Cloud Network Management Solution
H3C Cloudnet is a lightweight, cloud-based multiservice platform designed for small-to-medium enterprises, retail chains, and multi-branch organizations. It eliminates the need for on-site IT engineers by enabling fully remote, zero-touch device deployment and centralized network management through a cloud portal.
1. What is H3C Cloudnet?
Traditional network deployment requires experienced engineers to configure each device on-site via CLI - time-consuming, costly, and difficult to scale across branches. Cloudnet solves this by moving the entire management lifecycle to the cloud.
Key capabilities:
- Zero-touch provisioning: devices come online and self-register without manual CLI intervention
- Unified management of Routers, Switches, APs, and ACs from a single cloud portal
- Remote configuration push, monitoring, alerting, and firmware upgrade
- Multi-tenant MSP support for service providers managing multiple customer networks
- API integration for automation and third-party system connectivity
2. Platform Concepts
Organizational Hierarchy
Cloudnet uses a three-tier logical structure to organize managed networks:
- Branch - A logical container for sites, typically divided by region, brand, or HQ/subsidiary hierarchy. Up to 5 levels of branches are supported, with no limit on the number of branches.
- Site - A logical container for a set of devices at the same physical location (e.g., one store, one office). Multiple devices sharing the same network are grouped into one site.
- Area - A subdivision within a site for managing APs by geographic zone (e.g., floor, room, building wing). Supports multi-level division.
Account Types
| Account Type | Description |
|---|---|
| General Account (Tenant) | Top-level account with full permissions. Self-registered or created by MSP. |
| MSP Account | Special tenant account that manages multiple authorized customer networks. One MSP can manage up to 10 sub-MSPs. |
| Subaccount | Created by a tenant; up to 1,000 subaccounts with 5 hierarchy levels. Can be Discretionary (admin) or Read-only. |
| Temporary Account | Auto-generated password-free access link with expiry; useful for sharing with external maintenance personnel. |
3. Zero-Touch Onboarding - DHCP Option Method
This is the core Zero-Touch Provisioning (ZTP) mechanism for multi-branch deployments where HQ does not need to physically collect device serial numbers or send IT staff on-site.
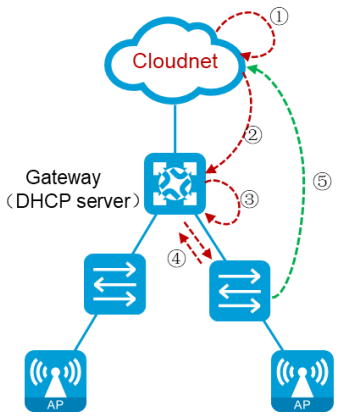
How It Works
[Cloud Admin]              [Gateway / DHCP Server]       [New Device (DHCP Client)]
     |                              |                               |
     | 1. Export site password      |                               |
     |----------------------------->|                               |
     |                              |                               |
     |   2. Configure DHCP Options  |                               |
     |      option 252 = site_password                              |
     |      option 253 = cloudnet.h3c.com                          |
     |                              |  3. DHCP Discover/Request    |
     |                              |<------------------------------|
     |                              |  4. DHCP Offer (opt 252/253) |
     |                              |----------------------------->|
     |                              |                               |
     |              5. Device resolves cloud domain & site password |
     |<--------------------------registration request---------------|
     | Verify site password -> auto-add device to site             |
Step-by-Step Process
- Admin exports the site password from Cloudnet (unique identifier per site).
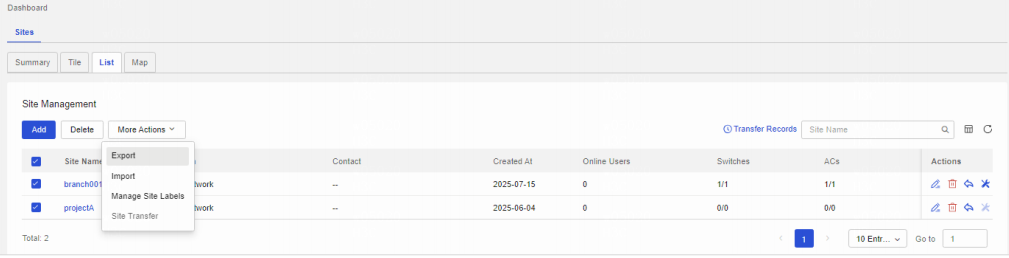
- Admin distributes the site password to on-site personnel.
- On-site personnel configure the gateway as DHCP server and add two DHCP Options:
option 252 ascii <site_password>
option 253 ascii cloudnet.h3c.com- New device boots and sends a DHCP request - gateway responds with IP + Option 252 + Option 253.
- Device auto-registers to Cloudnet using the site password and cloud domain - no manual SN entry required.
Requirement: The egress gateway device must be an H3C device. The gateway's SN still needs to be manually added to Cloudnet. All other downstream devices (switches, APs) register automatically.
Cloud Connection Establishment (Technical Detail)
Once a device has its cloud domain configured (either via DHCP Option or manual CLI), it establishes connection as follows:
- Device requests the primary connection URL from
cloudnet.h3c.com, sending its SN.
- Cloud platform verifies the SN is registered and returns the WebSocket connection URL.
- Device initiates a WebSocket connection to the cloud platform server.
- After handshake, device establishes sub-connections per service module (monitoring, config push, firmware upgrade, etc.).
- Sub-connections are isolated - failures in one service do not affect others.
4. Lab Walkthrough - Router + Switch + AP Onboarding
Lab Topology
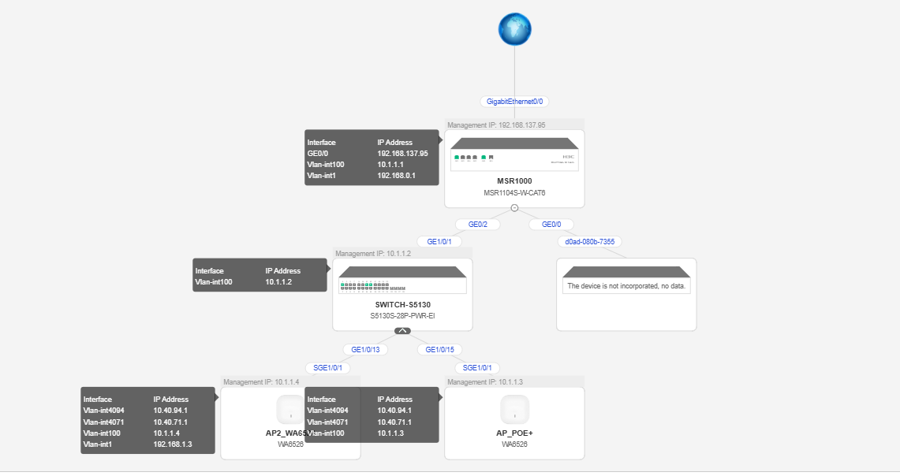
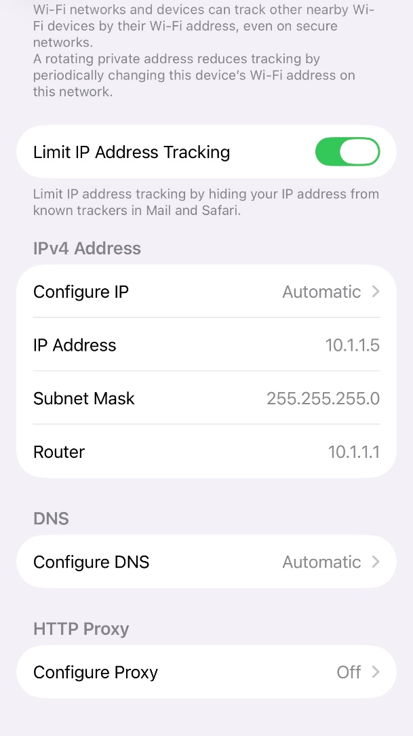
Internet -> Router (gateway + DHCP server, VLAN 100: 10.1.1.0/24)
Router -> Switch (Layer 2, trunk to APs)
Switch -> AP x2 (wireless clients, cloud-managed)
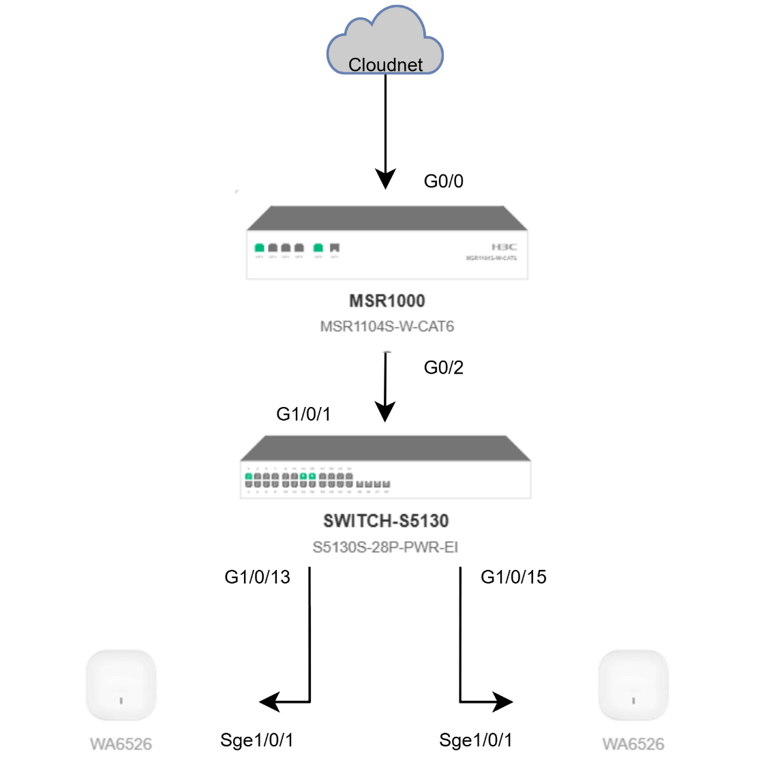
Step 1 - Router Configuration
The router acts as the WAN gateway and DHCP server for the local management VLAN.
# Point the router to the Cloudnet server
[Router] cloud-management server domain cloudnet.h3c.com

# Create management VLAN interface
[Router] interface Vlan-interface 100
[Router-Vlan-interface100] ip address 10.1.1.1 255.255.255.0

# Configure DHCP pool for VLAN 100
[Router] dhcp server ip-pool vlan100_pool
[Router-dhcp-pool-vlan100_pool] network 10.1.1.0 mask 255.255.255.0
[Router-dhcp-pool-vlan100_pool] gateway-list 10.1.1.1
[Router-dhcp-pool-vlan100_pool] quit
Record the Router Serial Number (SN) - required for manual device addition in Cloudnet.
Step 2 - Switch Configuration
# Point switch to Cloudnet
[Switch] cloud-management server domain cloudnet.h3c.com

# Create VLAN 100
[Switch] vlan 100

# Management interface (gets IP via DHCP from router)
[Switch] interface Vlan-interface 100
[Switch-Vlan-interface100] ip address dhcp-alloc

# Configure AP uplink ports as trunk
[Switch] interface GigabitEthernet 1/0/13
[Switch-GigabitEthernet1/0/13] port link-type trunk
[Switch-GigabitEthernet1/0/13] port trunk permit vlan 100
Record the Switch Serial Number (SN).
Step 3 - AP Configuration
# Point AP to Cloudnet
[AP] **cloud-management server domain cloudnet.h3c.com**

# Verify AP received IP from DHCP
<AP> display ip interface brief
Record the AP Serial Number(s) (SN). APs obtain management IP from the DHCP pool on the router via VLAN 100.
Step 4 - Add Devices in Cloudnet Portal
- Log in at https://cloudnet.h3c.com
- Navigate to Network > Devices > Add Device
- Select target Site, enter device Name and Serial Number (SN) for each device
- Monitor portal until all devices show Online status
For bulk import: download the Excel template from Cloudnet, fill in SN + site + name for all devices, then upload via Bulk Add Devices.
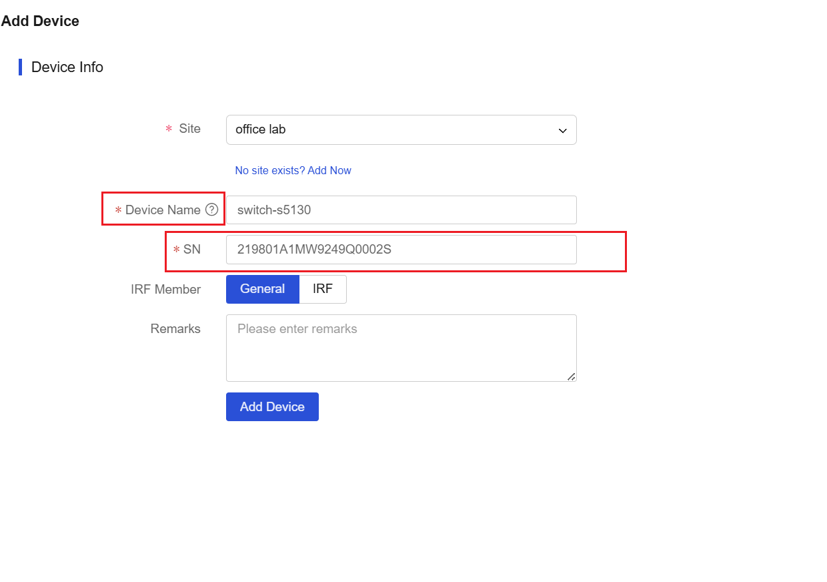
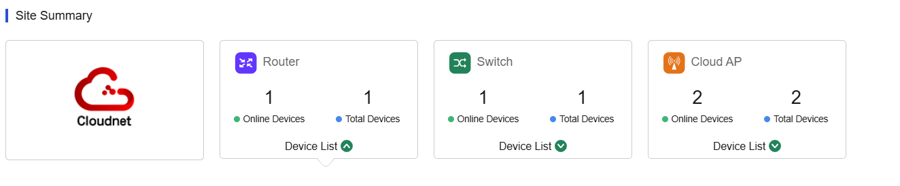
After add Devices, you could check all devices be added in Cloudnet page:
5. Push Config from Cloud - SSID & Portal Authentication
Once devices are online in Cloudnet, all Wi-Fi and authentication configuration is pushed centrally from the portal - no need to CLI into individual APs.
Step 1 - Set Region Code
Before configuring any SSID, you must set the correct wireless region code for your site:
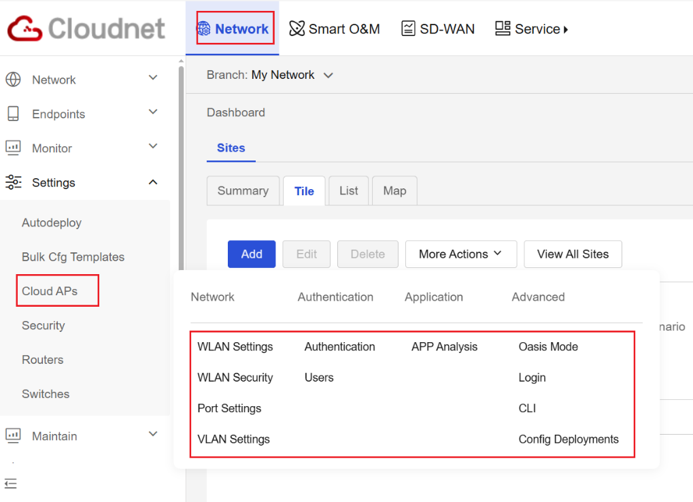
- Navigate to Settings > Cloud APs > WLAN Settings
- Select your Site (e.g.,
office lab) from the site dropdown
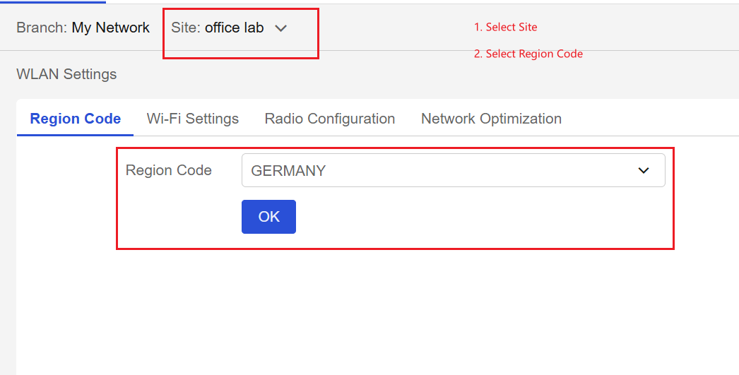
- Under the Region Code tab, select your country (e.g.,
GERMANY)
- Click OK to apply
Region code must be configured first - it determines the available Wi-Fi channels and radio frequencies for your country.
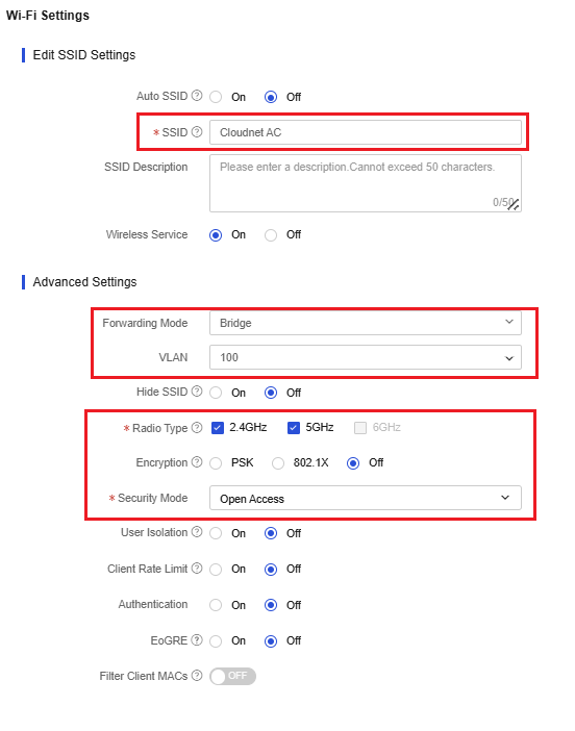
Step 2 - Configure SSID (Wi-Fi Settings)
- Navigate to Settings > Cloud APs > WLAN Settings > Wi-Fi Settings
- Click Add to create a new SSID
- Configure the following:
| Parameter | Value / Note |
|---|---|
| SSID | e.g., Cloudnet AC |
| Wireless Service | On |
| Forwarding Mode | Bridge |
| VLAN | 100 |
| Radio Type | 2.4GHz + 5GHz |
| Encryption | Off (Open Access for portal auth) |
| Security Mode | Open Access |
| Authentication | Off at SSID level (handled by portal) |
| EoGRE | Off |
Step 3 - Configure Portal Authentication
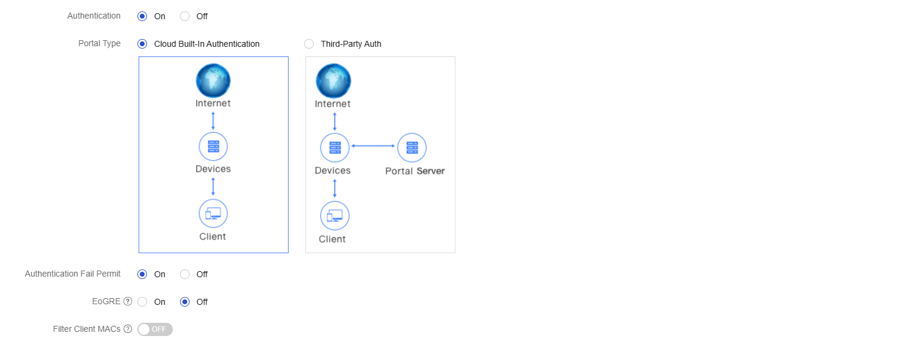
- Navigate to Settings > Cloud APs > WLAN Settings > Authentication
- Set Authentication -> On
- Select Portal Type -> Cloud Built-In Authentication (no external portal server required)
- Optionally enable Authentication Fail Permit -> On (allows internet access even if auth fails, useful for testing)
Cloud Built-In vs Third-Party Auth:
- Cloud Built-In - authentication handled entirely by the Cloudnet platform; no on-site portal server needed
- Third-Party Auth - redirects to an external portal server for enterprise-grade auth systems (e.g., RADIUS-linked portals)
Step 4 - Customize Portal Login Page (Optional)
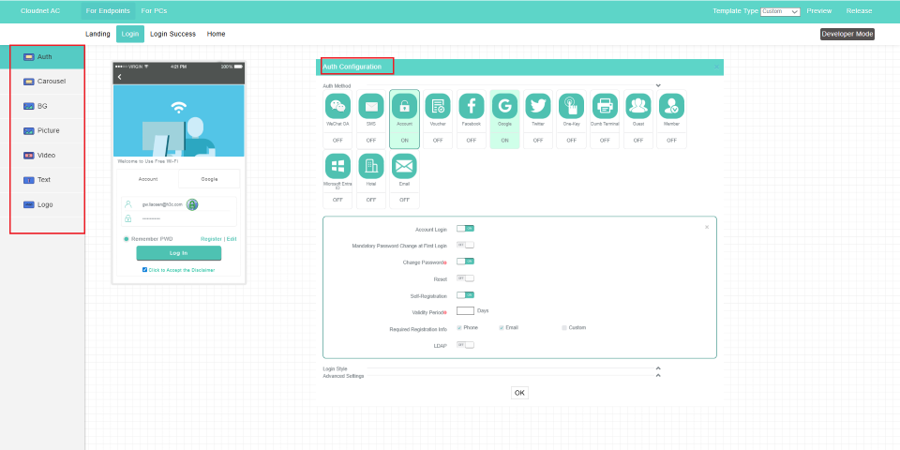
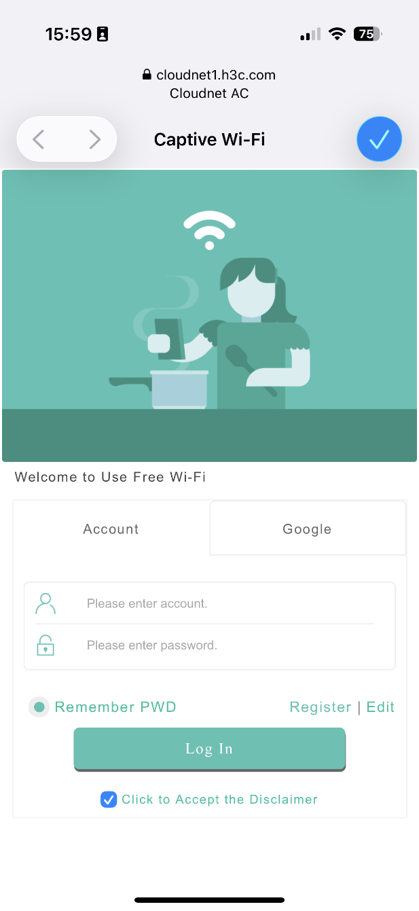
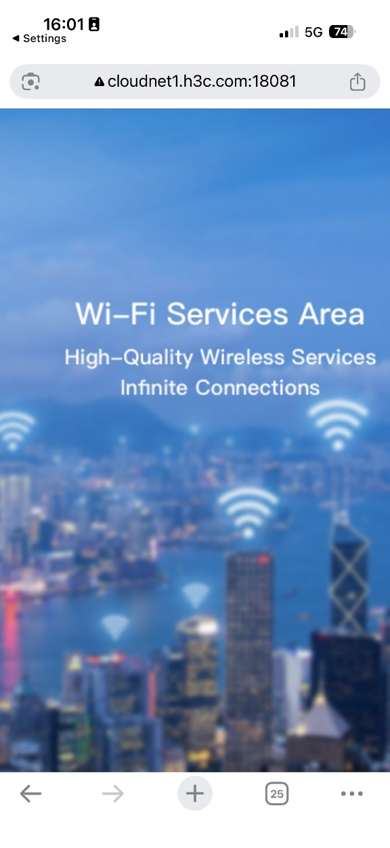
Navigate to the Auth Configuration panel to customize the captive portal page:
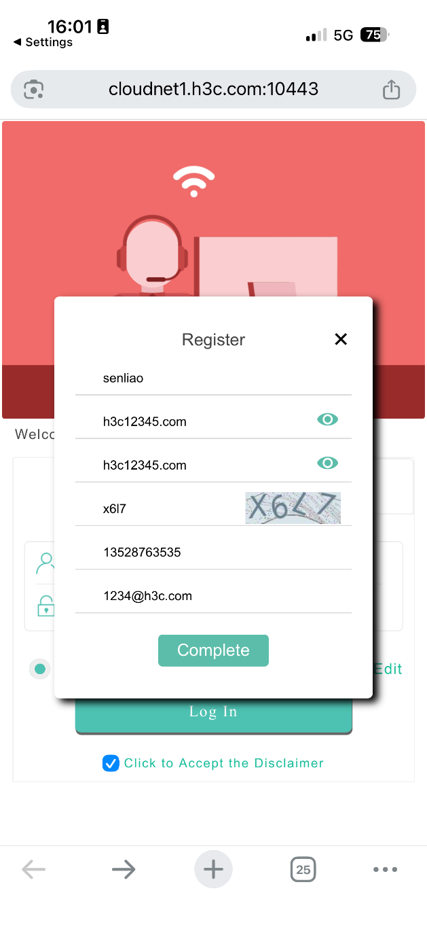
- Auth Method: Choose from Account, SMS, Google, Facebook, WeChat QR, Voucher, DingTalk, etc.
- Account Login: Enable/disable local account authentication
- Self-Registration: Allow users to register on first login
- Validity Period: Set session duration in days
- Required Registration Info: Phone / Email / Custom
- Page Style: Customize via Landing / Login / Login Success / Home tabs - supports background image, logo, carousel, video, and custom text

5. Auto-Deploy Templates (Bulk Deployment)
For large-scale multi-branch deployments, use Auto-Deploy Templates to pre-configure devices before they come online.
How it works:
- Create a template per device model (Router / Switch / AC) using:
- Command Line mode - full CLI config, suitable for advanced admins
- GUI mode - graphical form for basic VLAN/interface configs
- Copy mode - duplicate an existing template for quick replication
- Bind the template to one or more sites
- When a new device comes online in a bound site, Cloudnet automatically applies the template
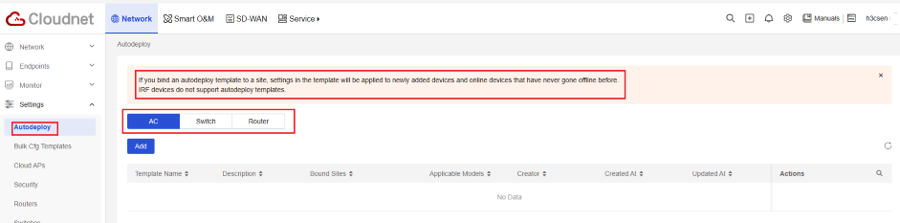
Note: Devices that go offline and come back online will not re-apply the template (to avoid overwriting manual changes). Only newly added devices receive the auto-deploy configuration.
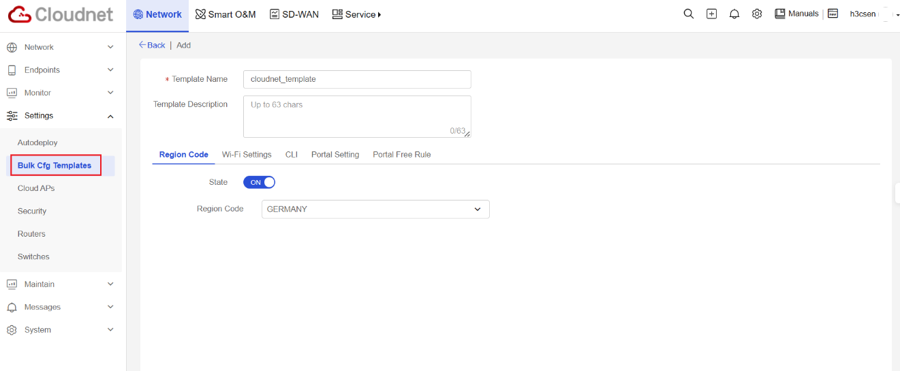
AP Bulk Config Template: For APs, use the Bulk CFG Template to batch-apply identical Wi-Fi settings (SSIDs, security, VLAN mapping) across all APs in a site simultaneously.
6. Platform Features Overview
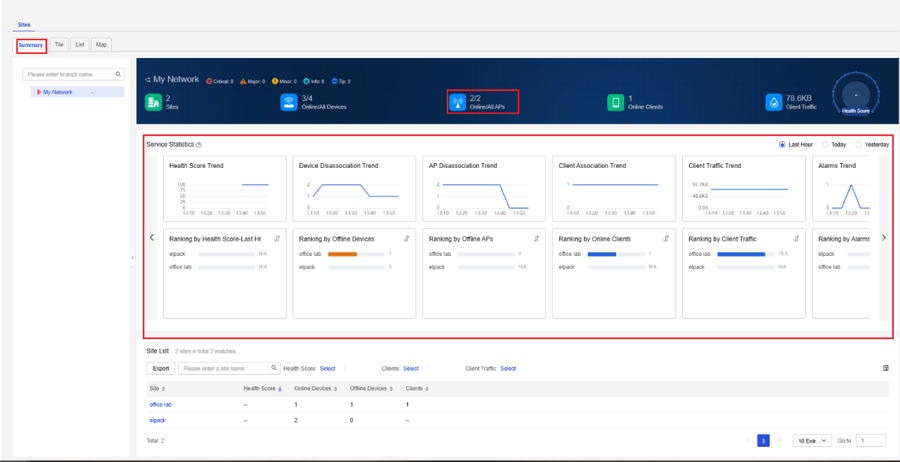
Device Monitoring
- Real-time device status: Online/Offline, CPU, Memory, Temperature
- Client statistics: connected clients count, signal strength, client performance metrics
- Alerts and event logs for troubleshooting
- Historical trend data per device
Multi-Tenant & Access Management
| Feature | Detail |
|---|---|
| MSP Account | Manage multiple tenant networks from one account; up to 10 sub-MSP levels |
| Sub-Accounts | Up to 1,000 subaccounts; Discretionary (admin) or Read-only roles |
| SAML SSO | Login via corporate Microsoft accounts or other SAML identity providers |
| Temporary Accounts | Password-free time-limited access links for external maintenance personnel |
| Regional Authorization | Restrict subaccount access by branch or by specific sites |
API Integration
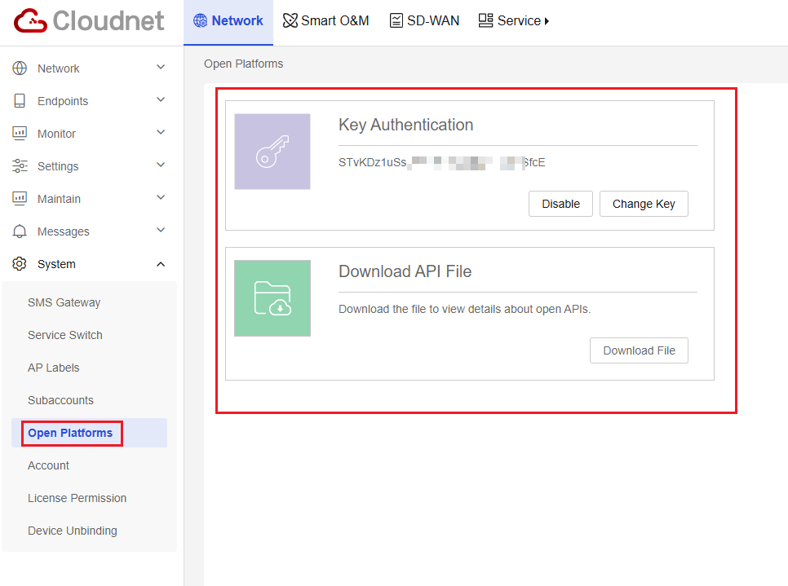
- Generate API Key in Cloudnet portal under System settings
- Full API documentation available in-portal
- Enables integration with ITSM, monitoring tools (e.g., Zabbix), or custom automation scripts
SNMP Configuration Note
All H3C Routers and Switches support standard SNMP Agent. For APs/ACs with dynamic Virtual Access (VA) interfaces, run the following to make VA interfaces visible to SNMP collectors:
[Device] snmp virtual-access visibleThis exposes VA interface traffic and status data to the standard MIB tables for collection by tools like Zabbix or SolarWinds.
7. Deployment Prerequisites Checklist
| Item | Requirement |
|---|---|
| Device Compatibility | Verify model + firmware version in Cloudnet Release Notes |
| License | Some device models require a Cloudnet License before onboarding |
| Cloud Domain | cloudnet.h3c.com - configured via CLI or DHCP Option 253 |
| Internet Access | Device must reach the internet and resolve Cloudnet domain |
| Firewall Rules | Allow TCP 80/443 and TCP 19443/5555/28443 to Cloudnet platform IPs |
| SN Recorded | Collect SN of each device before or during deployment |
Official Reference: H3C Cloudnet Rapid Deployment Technology White Paper - covers full deployment flowcharts, account setup, DHCP Option configuration, auto-deploy template setup, and cloud connection technical details.
Cloudnet Portal: https://cloudnet.h3c.com